Pre-Shipment Inspection for Steel Structures
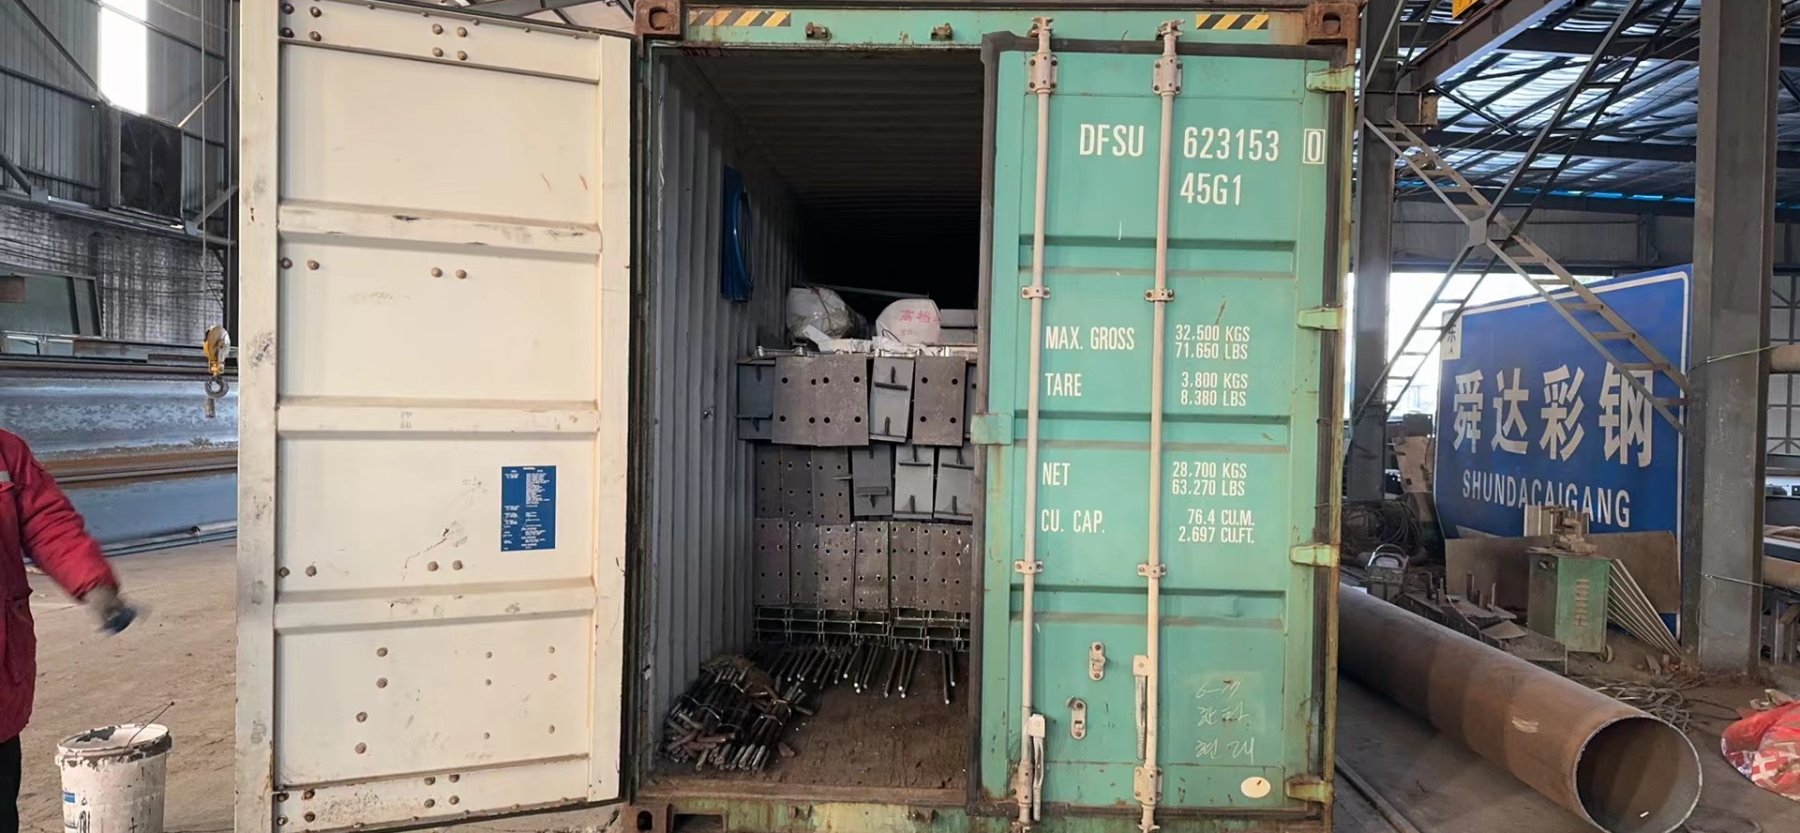
Most buyers arrange inspection at the wrong moment and for the wrong purpose. The inspection gets booked when the container is already full, and its purpose is treated as reassurance rather than verification. Both choices are comfortable and both are useless. By the time the steel is stacked inside the box, half the things worth checking are no longer reachable, and the half that remains cannot be compared to anything, because nobody brought the drawing.
What follows is the sequence that works, in the order the checks have to happen. It assumes you are the buyer, you are not at the factory, and you have one person on the ground for one day.
What inspection actually decides
Inspection decides one thing: whether the pile of steel in front of you is the pile of steel described in the documents you are paying against. It does not decide quality in the abstract. It does not certify a future. It answers a single question that has a yes or no, and the answer is only available while the goods are still in the factory, because that is the last place where a mistake can be corrected by the party who made it.
A comparison, not a tour of the yard
The distinction matters because the two activities look identical from the outside. A tour walks past the members, admires the welds, photographs the paint and finishes with a handshake. A comparison puts the shop drawing on a table, opens the packing list beside it, and then walks the pile checking marks against marks. A tour produces an impression. A comparison produces a list of differences, each one attached to a member number, and that list is the only output that can be acted on. Ask an inspector what they will do before they arrive, and the answer tells you which of the two you have bought.
Why the drawing has to be in the inspector's hands
Without the drawing, the inspector can confirm that the steel exists, that it is painted, and that it is roughly the shape it appears to be. That is not inspection, because none of those three facts can be wrong in a way that matters. The drawing supplies the member mark, the section, the length and the hole positions, and every one of those can be wrong in a way that costs a week on site. Bring the drawing, and bring the version that was used for fabrication rather than the version that was quoted, because the two are frequently not the same document.
What to measure on the members
Members are the easy part, which is why they are the part most inspections cover and stop. Marks, sections and hole positions are visible, checkable and cheap to fix while the steel is still in the yard. Two checks cover most of the risk, and both of them take less than an hour on a normal container load.
Marks and match marks
Every member should carry a mark that ties it to a position in the erection drawing, and every member that only fits one other member should carry a match mark tying the pair together. Check that the marks exist, that they are legible after painting, and that two different members do not share one mark. This is the single highest-yield check in the whole inspection, because a missing or duplicated mark does not fail in the factory. It fails on site, at height, when the wrong rafter is offered to the wrong column and the crew has to lower it again.
Bolt holes and hole gauge
Holes are where tolerance becomes visible. Check the hole diameter against the drawing, check that holes in a connection group are spaced to match the mating part, and check a sample of connections by offering the two parts together or by measuring the group with a gauge. Steel that was drilled separately and never trial-fitted can pass a visual check and still refuse to assemble, because the two parts are each within their own tolerance and still do not align. If trial assembly was not done at the factory, this is the check that catches it before the container does.
The parts nobody looks at
Two categories of item carry a disproportionate share of the trouble and almost never appear in an inspection report. Neither is expensive and neither is difficult to check. Both are invisible until the day they are needed, which is exactly why they get skipped.
The first hundred millimetres at each end
Member ends take the handling damage, and the damage is concentrated in the first part of the length because that is where slings, forks and neighbouring steel make contact. Look at the ends of every long member, not a sample of them. Check that the end protection is still in place, that it is a hard material rather than soft timber that has already crushed, and that it covers the flange edges rather than only the web. An end that has been deformed in handling will not bolt up cleanly, and the deformation is almost never visible in a photograph taken from a metre away.
Bolts, nuts and washers counted as one lot
Fasteners leave the factory as a separate consignment and arrive as a separate problem. Count them against the packing list by size and grade, not by total weight, and confirm they are packed as one identifiable lot rather than scattered through the bundles. A short count of one bolt size stops a connection as effectively as a missing beam, and it stops it at the moment when nobody can source a matching grade locally. Confirm also that the fasteners are packed to travel dry, because a container crossing a humid coast will rust loose fasteners long before it rusts painted members.
What to check on the packing
Packing is where the factory's assumptions about your site become visible. How the steel is bundled, where it is lifted, and in what order it is loaded all encode a belief about how it will be unloaded and erected. Those beliefs are either right or they are a problem you inherit, and inspection is the last point at which they can be corrected at no cost to you.
Bundling, lifting points and bearing
Check that bundles are restrained so they cannot spread in transit, that lifting points are marked and rated, and that no member bears load through a point the drawing did not intend. Long slender members bundled flat and stacked high will take a permanent set that no amount of site straightening recovers. Confirm the dunnage and the bearing arrangement, and confirm that nothing rests directly on a bolted connection or a machined face. Ask where the sling goes, and see whether the answer is marked on the bundle or invented on the spot.
The loading order against the erection order
Compare the loading sequence with the erection sequence. The first steel needed on site should be the last steel loaded, so that unloading and erection follow the same direction. When this is reversed, the site spends a day moving steel twice, and every subsequent lift is blocked by something that should not be there yet. This check costs nothing and is skipped almost always, because the loading plan and the erection plan are produced by two different people who never compare them.
What to put on paper
An inspection that is not written down did not happen. The report is the artefact that a supplier can act on, a freight forwarder can quote against, and a later dispute can be settled with. It does not need to be long. It needs to be specific enough that two people reading it would point at the same member.
Four photographs worth taking
Photograph the mark on a representative member, the hole group on a connection that was trial-fitted, the end protection on a long member, and the bundle as loaded with the container number visible. Four photographs, each answering a question someone will ask later. A hundred photographs of steel in a yard answer nothing, because none of them is tied to a member number or a document, and a photograph without a reference is a picture rather than evidence.
How to write a rejection that gets acted on
Write the member mark, the drawing reference, the observed condition and the required correction, in that order, one line per item. Do not write that the quality is poor. Write that rafter R-12 carries no match mark, that the drawing requires R-12 to pair with R-13, and that the mark has to be applied before loading. A rejection written that way can be closed by someone who was not present, which is the only test of whether a rejection is any good.
Written by Johnny, who ships steel buildings to buyers in Africa and South America who erect them without a factory crew on site. If you have a container loading coming up and want a second pair of eyes on the checklist, send me the packing list and I will tell you what I would add.
Related: protecting member ends · packing list and container list · bolts shipped loose · erection sequence as a design output